Spinning my own Yarn out of roving! My Favorite!!!
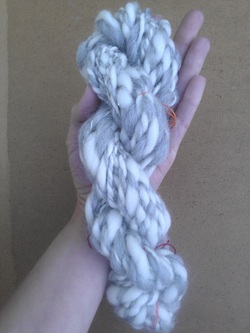
This was probably the most fun assignment we had. I loved this. We took roving (brushed out sheep wool) and spun our own yarn using a drop spindle. It was really challenging at first and I learned that different types of roving are harder to spin. I also learned that getting an even thickness is super tough, but it makes for some interesting textures.
It takes quite a bit of time, but I eventually enlisted Gabriela to help me. She was a great spinner while I eased in the roving. Once you have it spun you wind it onto a toilet paper roll and then place it in a lazy kate, which is basically a shoe box with two sticks running through that the rolls of yarn are placed on. When you ply your yarn you spin the counter clock wise to ply the two yarns together. I love the way it looks! Once it is played, you take it off and wrap it onto the knitty knotty that allows you to tie it off. Then you soak it in hot water and a small amount of mild detergent to set the twist. Hang it with a weight and wait for it to dry. Twist it up and you've got your own yarn.
I would definitely do this again!
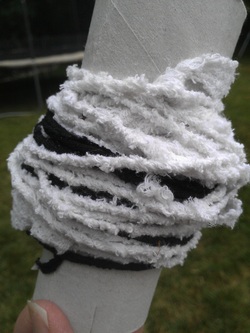
For my spinning extension i tried a couple of different things. My original idea was to spin this nice soft tall grass, but by the time I got around to doing it, my nephew had cut it all down. So I went out in search of other natural materials. The only thing I could feasibly see working was the straw/hay that was back there, but after trying to spin it, I found that it was very difficult to incorporate the new pieces into it. It was slick and all sorts of pieces sticking out everywhere. So I went in search of another material.
I happened upon some old clothes my husband had cut into scraps. One in particular caught me eye. It was an old childs thermal longs sleeve shirt. It already had a great texture to it, but I later found that that tooth is what made it so great to spin. I cut it up in strips and started spinning. The thermal material would grab on enough to connect the pieces together. I tried adding in cut up t-shirt strips (the black thread). It proved much more difficult. The t-shirts would rip under pressure and would consistently slip out. They also did not take the twist as well. I eventually started tying the strips together and went back to the thermal material because I like the texture so much.
I happened upon some old clothes my husband had cut into scraps. One in particular caught me eye. It was an old childs thermal longs sleeve shirt. It already had a great texture to it, but I later found that that tooth is what made it so great to spin. I cut it up in strips and started spinning. The thermal material would grab on enough to connect the pieces together. I tried adding in cut up t-shirt strips (the black thread). It proved much more difficult. The t-shirts would rip under pressure and would consistently slip out. They also did not take the twist as well. I eventually started tying the strips together and went back to the thermal material because I like the texture so much.
Learning to crochet from an 11 yr. old
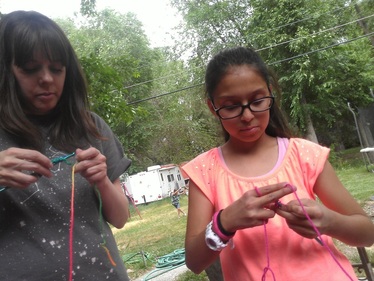
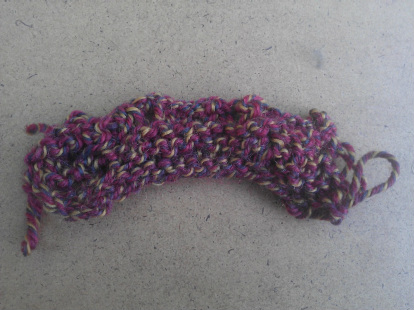
Well today I found a very useful tool...my 11 year old niece. She's so awesome. She brought over her knitting tools and her super cool hot pink beanie she's making. I think she thought it was a little weird that she was teaching an adult how to do something, but then she admitted it was "pretty cool." All I had was this awesome rainbow yarn to work with. My goal was to crochet a square. Pretty simple right? I had to restart three times, but Annabelle assured me that my first one would suck and be terrible and that I was only practicing. On my second attempt, she told me that it looked much better. I eventually got some awkward square, but I think I'll take another stab at it later tonight.
My thoughts on crocheting. Much better and less stressful than knitting. I wasn't holding my breath the whole time. I still don't know how to make anything out of it, so planning an extension should be fun. Maybe I'll go read that Idiot's Guide to Crocheting that Annabelle brought with her.
My thoughts on crocheting. Much better and less stressful than knitting. I wasn't holding my breath the whole time. I still don't know how to make anything out of it, so planning an extension should be fun. Maybe I'll go read that Idiot's Guide to Crocheting that Annabelle brought with her.
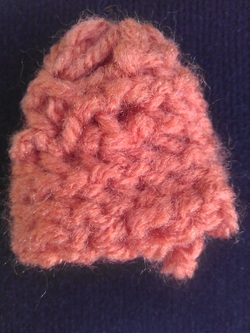
Here's my teeny beanie!
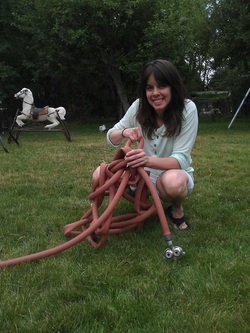
So what do you do after you learn to crochet? You crochet a garden hose. My idea was was to create a Fountain of Youth. I remember being a child and all of the memories made running in sprinklers, playing in those plastic pools from Walmart, and playing with the water hose. Now that I'm a mother, I am constantly telling my kids to turn off the water hose, because that is the favorite thing to play with during the summer. They love to flood the sandbox, squirt each other, fill buckets, and who knows what else. This problem becomes amplified when the neighborhood kids come over too.
So my Fountain of Youth would have been a crocheted water hose that would shape into a circle to form a friendship bracelet. I would then poke holes in it and turn the water on to create a sprinkler for the kids. It was a great idea....
...until I tried to crochet the water hose using my body. Those water hoses don't bend very well and they get really heavy. I could make a chain stitch pretty easily, but as soon as I tried to make a circle, it all fell apart. It wasn't very pretty either. If I was to seriously do this, I would have to find some other material that can hold water, but that can bend without creasing. I tried it with a second hose that was thinner, but the creasing problem became increasing worse. So smaller is not always better.
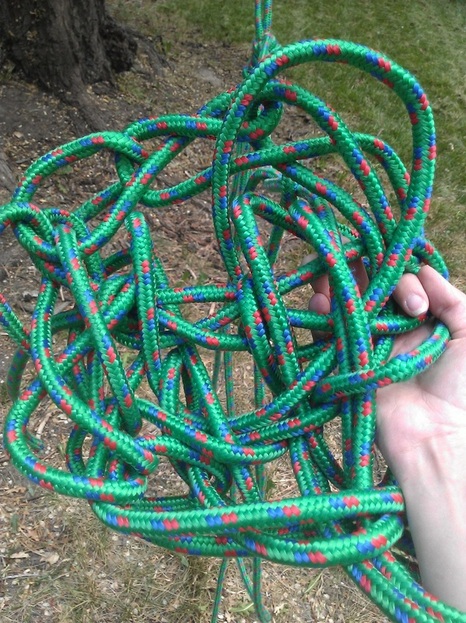
After feeling frustrated with that, I began to look for other things. I went for the most flexible material I could find in the backyard, which happened to be the rope tied to the willow. It was working pretty well, until I tried to create the circle, then I just kept getting lost in the loops. If this had kept going, it would have consumed me, literally.
So my Fountain of Youth would have been a crocheted water hose that would shape into a circle to form a friendship bracelet. I would then poke holes in it and turn the water on to create a sprinkler for the kids. It was a great idea....
...until I tried to crochet the water hose using my body. Those water hoses don't bend very well and they get really heavy. I could make a chain stitch pretty easily, but as soon as I tried to make a circle, it all fell apart. It wasn't very pretty either. If I was to seriously do this, I would have to find some other material that can hold water, but that can bend without creasing. I tried it with a second hose that was thinner, but the creasing problem became increasing worse. So smaller is not always better.
After feeling frustrated with that, I began to look for other things. I went for the most flexible material I could find in the backyard, which happened to be the rope tied to the willow. It was working pretty well, until I tried to create the circle, then I just kept getting lost in the loops. If this had kept going, it would have consumed me, literally.
Knitting
This was definitely not my favorite. It makes you hold your breath the whole time. I got lost so many times and you can't just pull it out when you mess up. I would have to spend a lot of time with this one in order to get it down and feel good about it. I felt much better with the crochet.
I'm All of Made of HInges!(Rigid material into a flexible plane)

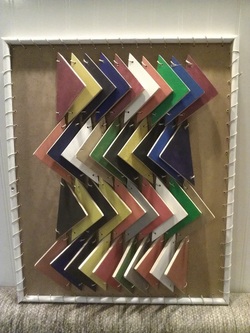
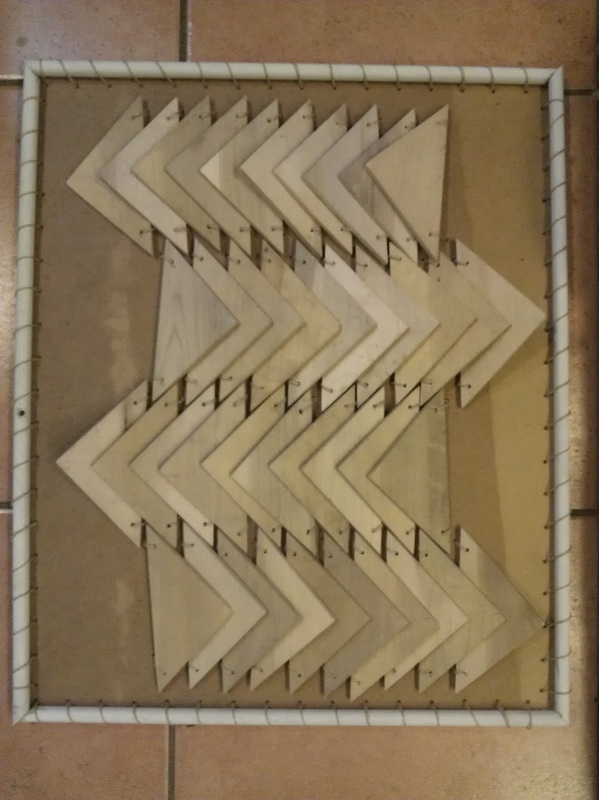
Hinges, hinges, hinges. The assignment was to take a rigid item and hinge them to make a flexible plane.
I had rescued these lovelies from my neighbor's construction scraps when he redid his cabinets. When I went over to get my girls from his house they immediately caught my eye and he said I could have them. I had no idea what to do with them at the time, but knew they had a lot of potential. I figured this assignment was the perfect opportunity to get them out and see what's possible.
As I started configuring them, I fell in love with them. I might have a running series with triangles. I also really liked the raw look of the wood. I love the shadows, the positive and negative space, the rhythm, and the pattern of them all lined up in a row. My idea is to hinge them to a flat surface where they can be flipped either way to create new works of art. I am going to paint the backside of them with color to create new and interesting color patterns and design.
I'm really excited about this one.
All Finished!
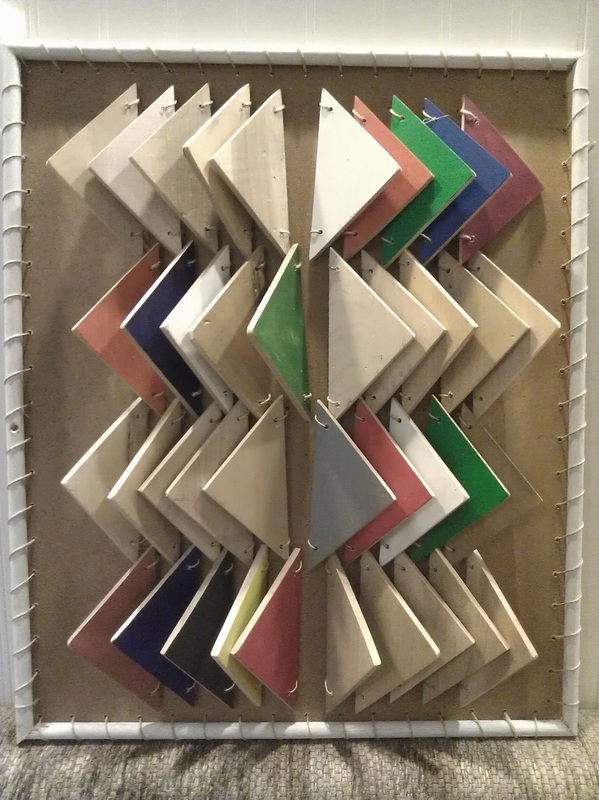
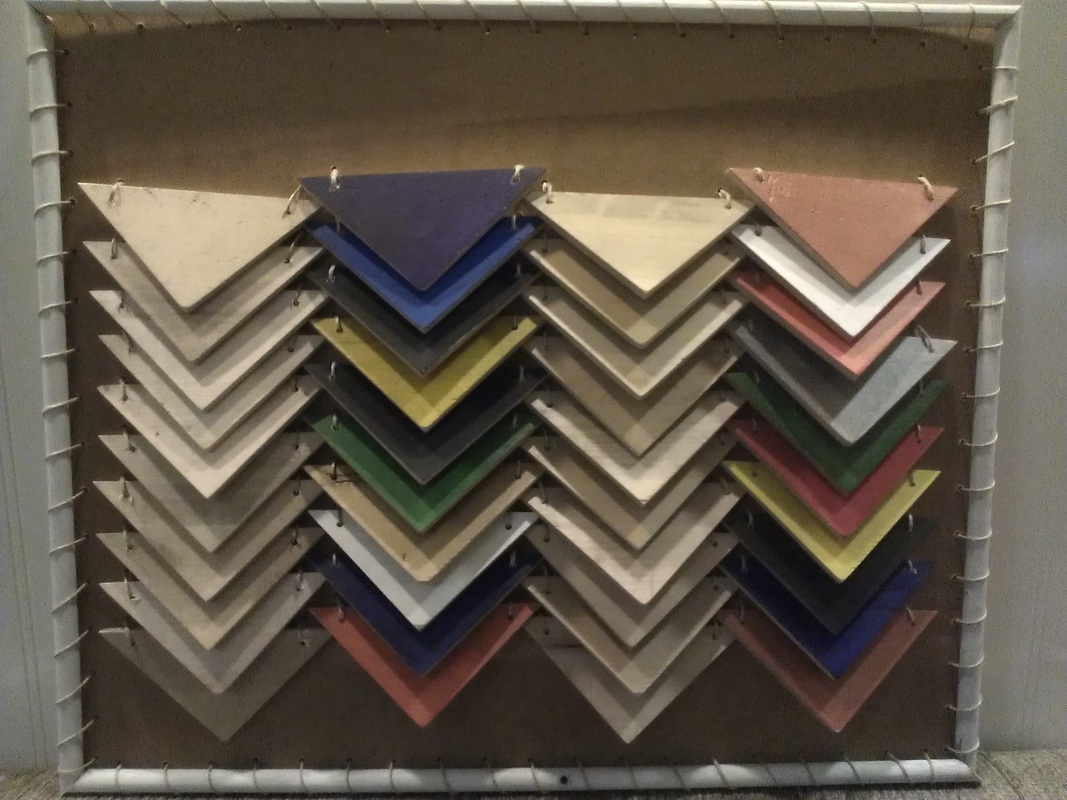
This project took on a life of its own. When I initially started I thought it would turn out to be a very minimalist piece. Really modern and solely about the shape, shadow, and pattern. It turned out more like an earthy tribal art piece. I think it is due to the buckskin color and discoloration of the back board . I think the natural color of the twine used to tie it leans to the more earthy direction. So in the end I decided to enhance that and add the wooden stick like pieces and stitch them to the outside. I think the piece is intriguing and different. It is still about those initial elements, but the other elements add interest. My favorite part is that it has endless possibilities. The viewer can flip the pieces to create new patterns or color combinations. It can be all natural wood, all color, or split in many different ways.
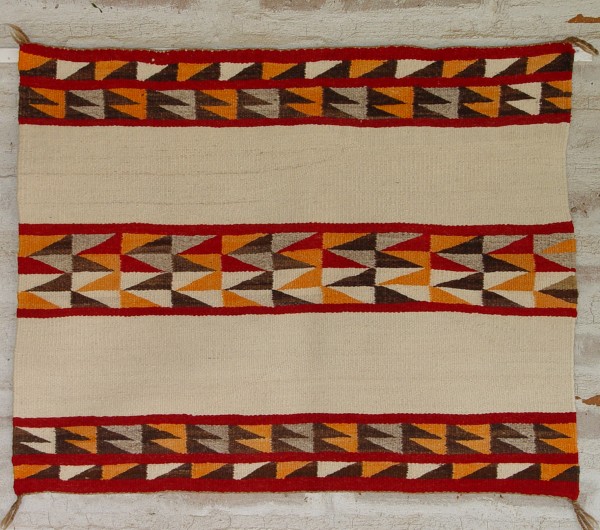
It reminds me of traditional Navajo weaving patterns. Perhaps if I had done a white background, it would have felt completely different. Something to consider in the future.
This project took on a life of its own. When I initially started I thought it would turn out to be a very minimalist piece. Really modern and solely about the shape, shadow, and pattern. It turned out more like an earthy tribal art piece. I think it is due to the buckskin color and discoloration of the back board . I think the natural color of the twine used to tie it leans to the more earthy direction. So in the end I decided to enhance that and add the wooden stick like pieces and stitch them to the outside. I think the piece is intriguing and different. It is still about those initial elements, but the other elements add interest. My favorite part is that it has endless possibilities. The viewer can flip the pieces to create new patterns or color combinations. It can be all natural wood, all color, or split in many different ways.
It reminds me of traditional Navajo weaving patterns. Perhaps if I had done a white background, it would have felt completely different. Something to consider in the future.
Prepping for Guatemala...back strap weaving
I've had this long running (ok, maybe a year) interest in back strap weaving since I've been looking into folk arts of Mexico. I know Guatemala is famous for their weavings as well, so I wanted an authentic experience. I knew the class probably wasn't going to cover it, but that they would talk about weaving, I decided to take my learning into my own hands and look up videos on how to do this. I found this awesome lady who walks you through the whole process. You can find it here:
http://backstrapweaving.wordpress.com/backstrap-basics-an-article-from-weavezine-by-laverne-waddington/
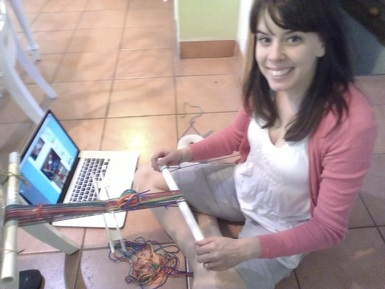
So I went about the house trying to find materials I could already use. For my supports I used PVC pipes with caps on the end. For my back strap I used a pillowcase with yarn tied to the ends. I used a plastic ruler for my beater/sword and a piece of cardboard for my shuttle. Don't worry the website listed above goes over all of that.
My first attempt was with yarn. Not so good. as the heddles slide up and down it was making the yarn peel and it wasn't sliding very well at all. After a couple of attempts, I abandoned it and started over using different material.
http://backstrapweaving.wordpress.com/backstrap-basics-an-article-from-weavezine-by-laverne-waddington/
So I went about the house trying to find materials I could already use. For my supports I used PVC pipes with caps on the end. For my back strap I used a pillowcase with yarn tied to the ends. I used a plastic ruler for my beater/sword and a piece of cardboard for my shuttle. Don't worry the website listed above goes over all of that.
My first attempt was with yarn. Not so good. as the heddles slide up and down it was making the yarn peel and it wasn't sliding very well at all. After a couple of attempts, I abandoned it and started over using different material.

Round 2:
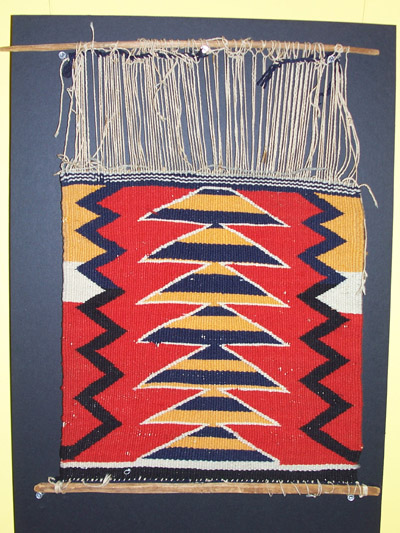
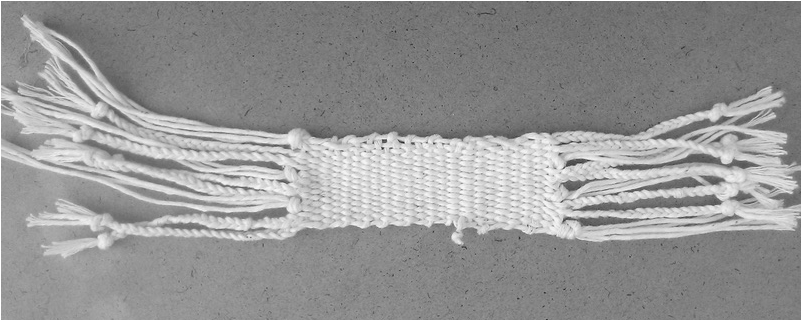
This time I moved to a more comfortable area instead of the hard kitchen tile floor. I used a pretty soft cotton twine that you get from a hardware store. It worked much better and like with any practice I was getting better. I struggled at first with knowing which heddle to flip and when. I also have trouble with one of the end warps. In the end I came up with a piece that I was pretty darn proud of.
This time I moved to a more comfortable area instead of the hard kitchen tile floor. I used a pretty soft cotton twine that you get from a hardware store. It worked much better and like with any practice I was getting better. I struggled at first with knowing which heddle to flip and when. I also have trouble with one of the end warps. In the end I came up with a piece that I was pretty darn proud of.
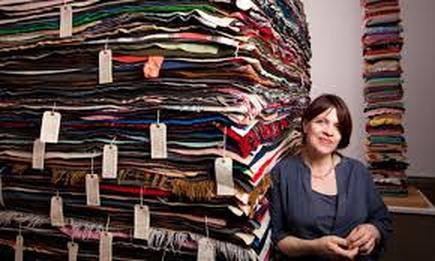
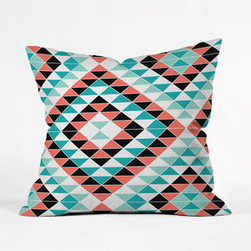
For my weaving extension, I took inspiration from Marie Watt. I loved her stacked blankets that are at the BYU MOA. I love the tags that talk about the stories associated with each one. They are a collection of memories. I'm also really interested in traditional weaving, especially in Guatemala. The women make what's called huipiles, which are long tunics that are woven and embroidered on back strap looms. You can identify which village the people are from by their designs and patterns on their clothing. Those weavings are a marker of the people who make them.
For my project, I would like to do a community weaving project where I seek to connect to my neighbors and community by going door to door and asking each family to donate an item that represents them to my weaving project. At the end, the weaving piece will be a visual representation and a marker of these people. It's almost a portrait of the community.
For my project, I would like to do a community weaving project where I seek to connect to my neighbors and community by going door to door and asking each family to donate an item that represents them to my weaving project. At the end, the weaving piece will be a visual representation and a marker of these people. It's almost a portrait of the community.
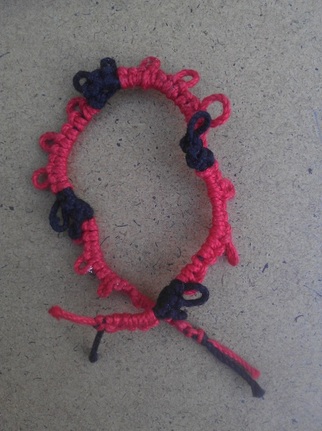
Macrame
First, I had no idea what this was when I started. We were demoed a bracelet in class and I thought, ok, that's pretty cool. It wasn't until I got home and I started looking up what macrame was that I was like, "OH, I remember that strange hanging glass table that hung in my house when I was a kid. This is my mother's art form from the late 70s.
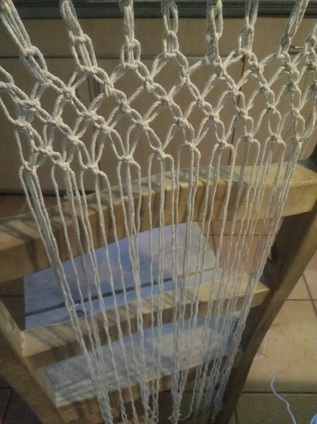
It's really just a series of knots. So my attempt was tied to a stick I found outside that was tied to the back of one of my kitchen chairs. I found this awesome curtain online that was done with ropes so I thought I would try a miniature version of that for my first attempt.
I actually really liked it and loved the simplicity of it. I could have kept on going but I think it's pretty cool the way it is, with the loose strings and all. Apparently we like it so much that it is still hanging from said kitchen chair. I don't know if I would ever actually make a macrame piece because I'm too practical and probably too impatient. What I would do however is use it as a stencil to spray through. I think it creates some neat textures and patterns, but I've got to come up with some other way to use it.
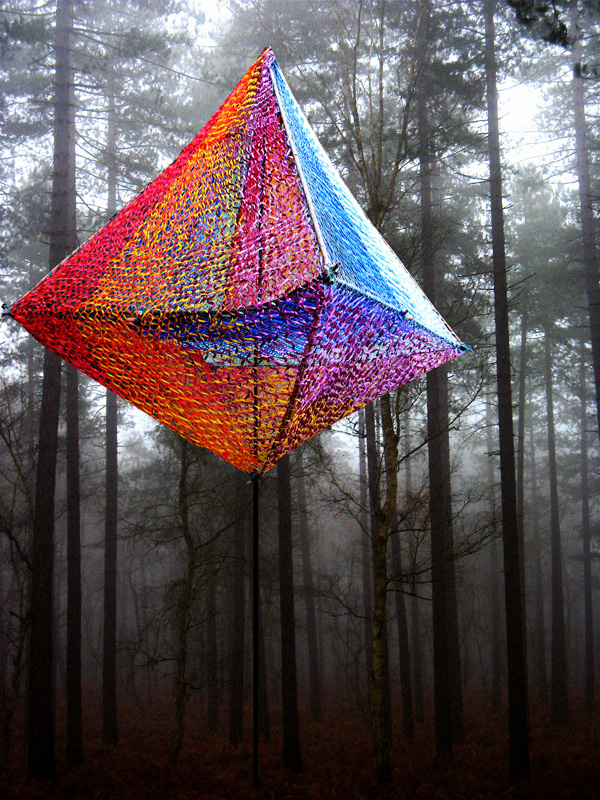
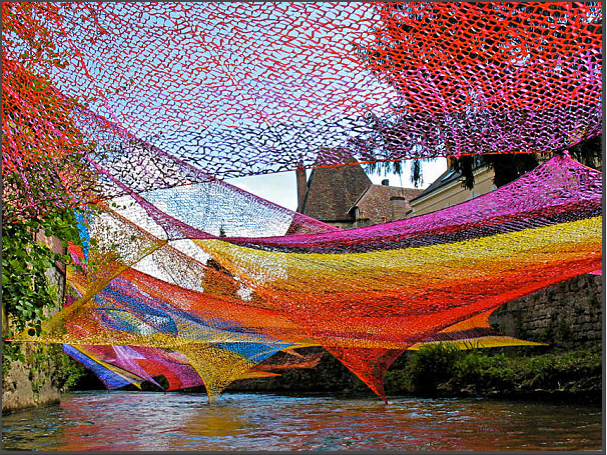
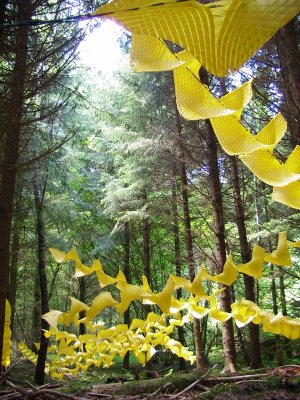
Artist inspiration: edith meusnier
tatting
Thoughts on tatting. So dang hard to learn. It takes some dexterity that I did not have. I do like it and think it has some potential that I did not see with some of the other things that I learned. I would like to learn the history of tatting, because It takes so long with such little tiny results. I think I will practice this one more. The larger the string size, the easier it is, but you do have to work on getting your fingers to do what they want.
For a future project, I would like to create a mask and do a self portrait for Dia de los Muertos. I think it could add some great texture for a multi media piece.
Found this cool piece online that reminded me of tatting, but it's made from cable ties. Pretty Cool!
Check out Andi Regan out of the UK. She's an up-cycler!
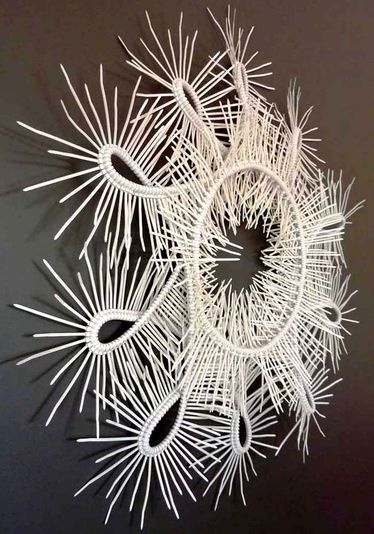
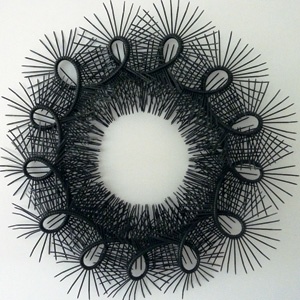
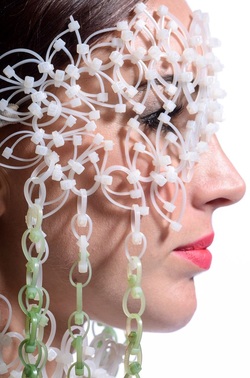
One of my tatting ideas was to create a mask, and what do you know...Andi Regan made one of those too!
rock wrapping
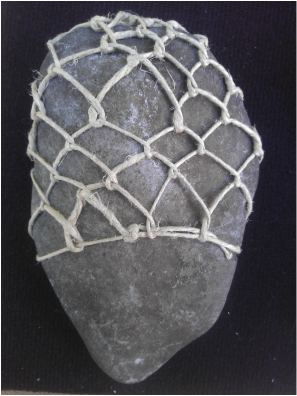
I like the results of this one. This is comes from the fishing tradition of tying weights to your nets to get them to sink. They would wrap rocks in order to do this. This little beauty was collected from my backyard out by the river.
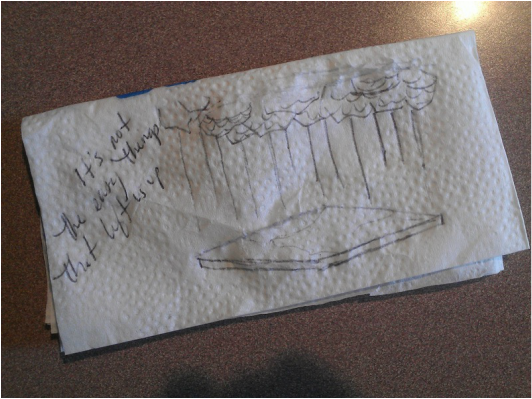
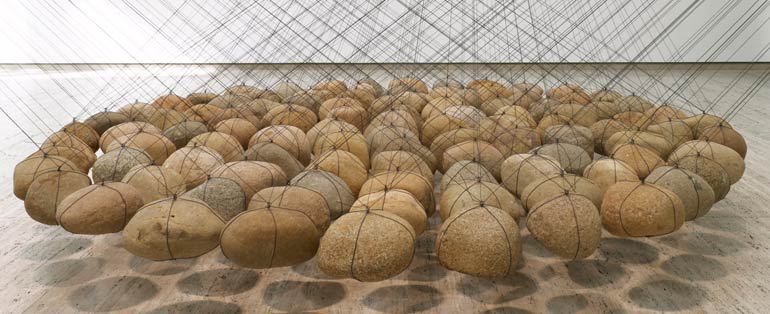
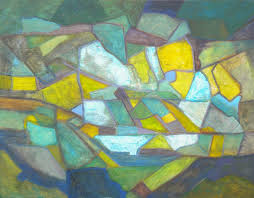
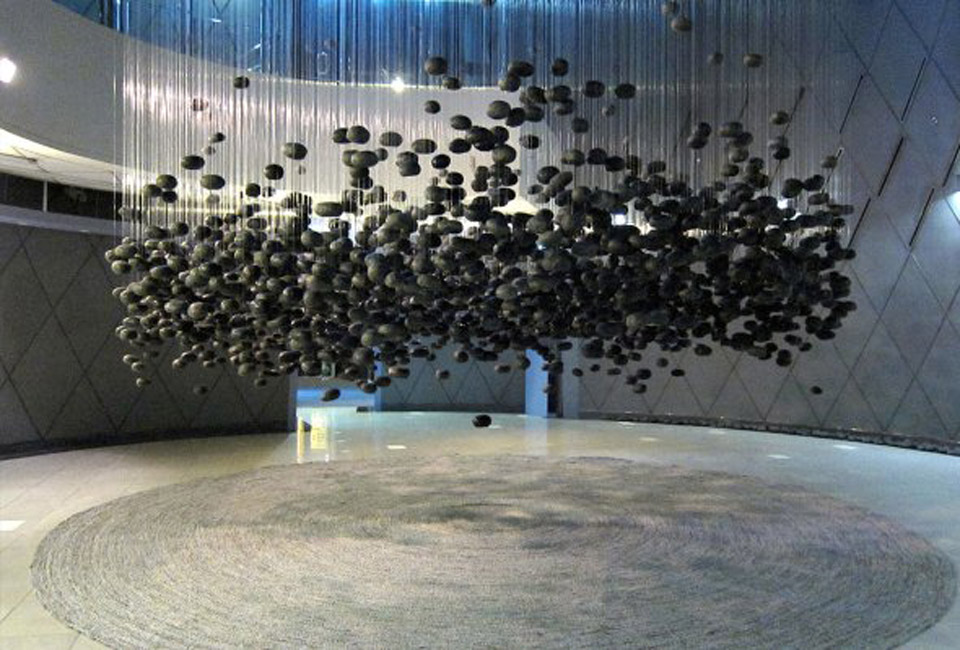
I want to do an installation piece in the future talking about how the hard things in life actually lift us to places that we never would think possible. Those hard things take us places, and help us to gain clearer perspective. I would like to wrap boulders and suspend them from the ceiling, making them appear weightless, while allowing the tails to drape below. Maybe I would do an abstract landscape painting that would lie beneath it. I would have to do some more thinking on this one, but I like where it is going.
I want to do an installation piece in the future talking about how the hard things in life actually lift us to places that we never would think possible. Those hard things take us places, and help us to gain clearer perspective. I would like to wrap boulders and suspend them from the ceiling, making them appear weightless, while allowing the tails to drape below. Maybe I would do an abstract landscape painting that would lie beneath it. I would have to do some more thinking on this one, but I like where it is going.
Embroidery...love it!
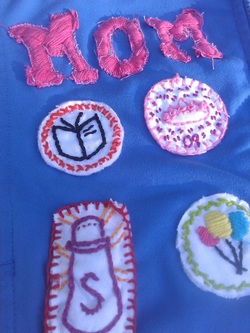
I fell in love with embroidery from all my trips to Mexico and all of the lovely traditional embroidered clothing pieces they have. I took it upon myself to learn it and went to the store and bought a manual that had some stitches in it. I made Mommy Merit Badges, or at least the ones I think I had won or earned up until this point in my life. The book represents all of the books I've read to my kids and the countless hours of listening to take home readers from school. Sitting with a child while learning to read can be torturous at times and I've done it 3 times!!!
The balloons represent all of the party planning I've done for my own family and also for my extended family. I am the designated party woman on my husband's side of the family.
The salt shaker is the "take it with a grain of salt" award. Everyone wants to give you advice on how to raise your kids, but sometimes you've got to follow your gut and do things your own way. It takes time to be able to do this one.
The crown was for when I did the Mrs. Utah pageant in order to challenge myself and become a better person.
Embroidery is fun and enjoyable. I can control it better. It feels a little like drawing with thread.
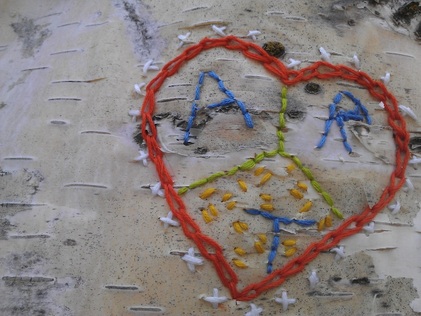
My extension for embroidery was to find a unique material to embroider. I was eyeing the willow tree in the backyard and trying to figure out if I could get a needle through he bark, but then decided that it would be too difficult. But then I thought of the aspen in front yard, and ran to see if it was peeling bark like I remembered from the past.
To my excitement it was, so I grabbed the ladder and started scoping out the best spots to peel from. After several attempts, I was able to get off a large enough piece to use.
I actually really like the way it turned out. The two different textures compliment each other.
On my drives through the Alpine Loop, I always notice the markings in the aspen trees. They are the scars of lovers trying to capture their memories and relationships. They are the marks of young love (because any sensible adult wouldn't carve into a tree, right?), which made me think about some of my first loves in life. Way before I began dating, or even thinking about boys, I loved art. I loved making things, coloring in coloring books, crafting with my mother, drawing, you name it. It was my passion and I knew from a young age. So this piece reminds me of my juvenile crush on the arts.
Breaking the plain. sewing.
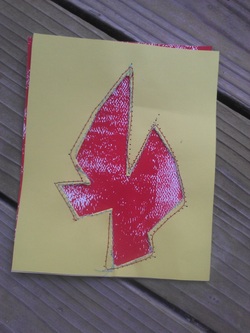
This was a quick and dirty sewing job. Don't pay attention to the crazy stitches, which actually enhances it in my opinion, but my sewing machine was having tension issues. It was a fun experiment where we sewed paper, cut into the shape, folded it back and then placed it on another paper and sewed around the shape to secure it. If I had more time, I would go back and try this again.
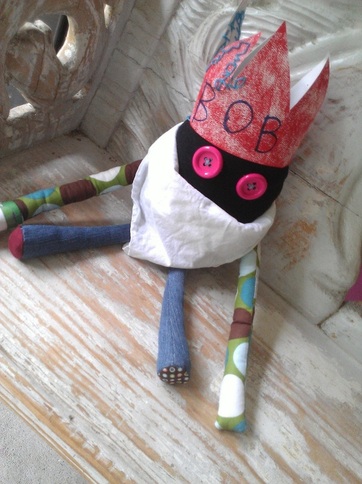
Meet Bob. He's my creative genius. This idea was taken by a TED TALK given by the author of Eat Pray Love, Elizabeth Gilbert. She talks about the difference between Humanistic thought vs. the ancient thought of the Greek and Romans , where artistic ability was associated with creative geniuses that lived within the walls of the artists' studios. When an artist was amazing it was impart due to the creative genius, so the artist would have a healthy dose of humility and couldn't completely take credit for the masterpiece. On the other hand, if the work was terrible, it wasn't entirely their fault either. This protected the artist from going insane from the pressure to create or perform. It helped buffer the psychological problems that are associated with many artists is all areas of the arts.
I would like to discuss these ideas and get my students' feedback and possibly make their own creative geniuses at the beginning of the year in order to help set some of their anxiety to the side.
This is my flat patterning extension. I learned how to do a blind stitch and how to create those legs where the foot is rounded off rather than be a straight stitch across the bottom like the arms. I also experimented with using a third piece on the bottom to help the figure sit and be flat on the bottom. This was a fun one to think through and I will continue to add to Bob over the summer to make him awesome!
